 ENG
ENG  English
 русский
 Español
 Português
 عربى
عربى


Picture a soap dispenser pump with a rigid polypropylene body and a soft-touch TPE button. A decade ago, the standard route was to mold the two components separately, then press-fit or glue them together. The failure modes—peeling grips, slipping handles, double inventory, extra labor—are all familiar to production engineers. A two-shot (2-shot) molding press removes most of that by molding the core, rotating the tool, and overmolding the grip inside the same cycle. The catch is that this compact process only works when mold geometry, material pair, and machine behavior are designed together. These guidelines are the difference between a dependable mechanical joint and a delamination claim.
Content
- 1 What Is 2-Shot Molding?
- 2 Seven Design Rules That Decide Molding Success
- 2.1 Rule 1: Start With the Material Pair
- 2.2 Rule 2: Keep the First-Shot Wall Rigid Enough
- 2.3 Rule 3: Design Shut-Off Lands That Survive Injection Pressure
- 2.4 Rule 4: Gate the Second Shot Parallel to the Existing Surface
- 2.5 Rule 5: Account for Differential Shrinkage and Draft
- 2.6 Rule 6: Plan the Ejection Sequence
- 2.7 Rule 7: Set Tolerances With the Interface in Mind
- 3 Machine Selection: Matching the Press to the Mold
- 4 Common Defects and How Design Prevents Them
- 5 Cost and Cycle-Time Reality Check
- 6 Frequently Asked Questions
- 6.1 Q1: What is 2-shot molding?
- 6.2 Q2: What is the difference between two-shot molding and overmolding?
- 6.3 Q3: Which materials can be used in two-color injection molding?
- 6.4 Q4: Is double injection the same as 2K molding?
- 6.5 Q5: How much does a 2-shot injection molding machine cost?
- 6.6 Q6: Can 2-shot molding be done on a standard injection molding machine?
What Is 2-Shot Molding?
Two-shot molding—also called two-component, dual-shot, or 2K molding—uses a single clamp unit but two separate injection units. In a typical rotary-table layout, a mold mounted on a rotating plate receives the first material, indexes 180 degrees, then closes on the second barrel for the second shot. The two materials solidify against each other, forming a chemical or mechanical bond, and the multi-material part is ejected in the same cycle. No insert handling, no secondary press, no adhesive.
Designers often ask whether two-shot molding is the same as overmolding. Strictly speaking, overmolding can be done on a standard machine by transferring a cured insert into another mold. Two-shot molding is the integrated version: one machine, one cycle, one mold set. That distinction matters at quoting time, because genuine two-shot tooling is typically more expensive to build but cheaper to run. A two-color injection molding machine implements this principle with a dedicated control system for both barrels and a servo-driven index plate.
Seven Design Rules That Decide Molding Success
Once the machine concept is fixed, the mold designer controls the outcome. These rules are ordered by the frequency of issues seen in production and customer audits.
Rule 1: Start With the Material Pair
Bond strength is the first gate. A TPE will not chemically grip every engineering plastic. On polypropylene, most styrenic TPEs form a strong bond; on PBT or nylon, the joint usually depends on mechanical interlock alone, which is weak in peel. A practical starting point is to pair materials with similar melt temperatures, roughly within 40–60°C, so the second shot does not over-soften the first. Always validate with the specific TPE grade rather than a generic datasheet, since hardness and oil content change adhesion behaviour significantly.
Relative Bond Strength: TPE Overmolded on Common Substrates
* Usually requires a primer or surface treatment. Values are relative for design planning, based on common TPE overmolding recommendations.
Rule 2: Keep the First-Shot Wall Rigid Enough
The substrate of shot 1 must stay mechanically stable while the second barrel packs against it. For most thermoplastics, keep the minimum wall of shot 1 above 1.2 mm; thin-walled language applies here just as it does in single-shot molding. Where the second material wraps around an edge, machine a recessed undercut into the first-shot geometry. This mechanical lock protects the chemical bond and survives peel stresses far better than a flat interface.
Rule 3: Design Shut-Off Lands That Survive Injection Pressure
Every sealing line between the two cavities has to resist the second injection pressure. Design shut-off lands at least 3 mm wide on the parting plane, with steel angles perpendicular to the direction of closing. Avoid stepped shut-offs that let flash jump from a worn corner. If a knockout pin must sit near the second-shot cavity, place the pin inside the shut-off land so no witness mark becomes a leak path.
Rule 4: Gate the Second Shot Parallel to the Existing Surface
The gate for shot 2 must direct melt into the cavity without eroding the first-shot surface. The safest geometry is a submarine or tunnel gate oriented parallel to the existing wall, so flow slides over the first material instead of impinging perpendistrongly. Packing pressure then has to be balanced between the two gates; mold-flow analysis is now standard for verifying that balance before steel is cut.
Rule 5: Account for Differential Shrinkage and Draft
The two materials shrink at different rates. A rigid ABS substrate might shrink around 0.5%, while a soft TPE can shrink 1.5–2.5%. The stiffer material dictates the final dimension, but residual interface stress can cause warpage in thin beams. Keep draft angles of 1–2° on external walls and 2–3° where the second shot wraps around bosses. On parts longer than 150 mm, add an extra 0.1–0.2° per 100 mm of length, because a rotary index error at the platen becomes a visible mismatch at the far edge of the cavity.
Rule 6: Plan the Ejection Sequence
Two-shot molds often need two-stage ejection because the second material will stick to a textured core. Use stripper plates for the side with high TPE adhesion, and keep core pins stepped to avoid suction marks. The far more common problem is scoring the first-shot surface during rotation: every core that must clear the second cavity height needs enough travel before the table indexes. This becomes a mold-size calculation early in the design, not a shop-floor adjustment.
Rule 7: Set Tolerances With the Interface in Mind
Multi-material parts accumulate tolerance from two different shrinkage curves and one index mechanism. Avoid specifying tight positional tolerances across the material boundary. Instead, define a parting witness allowed on the second-shot side, and design mating features that self-locate. This approach is widely adopted in automotive interior parts, medical handles, and consumer electronics covers—segments we support through dedicated application engineering.
Machine Selection: Matching the Press to the Mold
Choosing the injection machine is not an afterthought. Three machine-side parameters directly affect mold design: projected area, shot volume, and rotary-table diameter. Molders typically estimate required clamping force by adding the projected area of both cavities and applying the material-specific tonnage factor, then adding a 10–20% safety margin. Second, injection-unit balance matters: if the TPE shot is only 2–5 g, the metering resolution of the second barrel determines whether you can hold ±0.1 g repeatability. Third, the rotary table must clear all cores and slides during indexing—this often sets the minimum tie-bar spacing before rated tonnage is even considered.
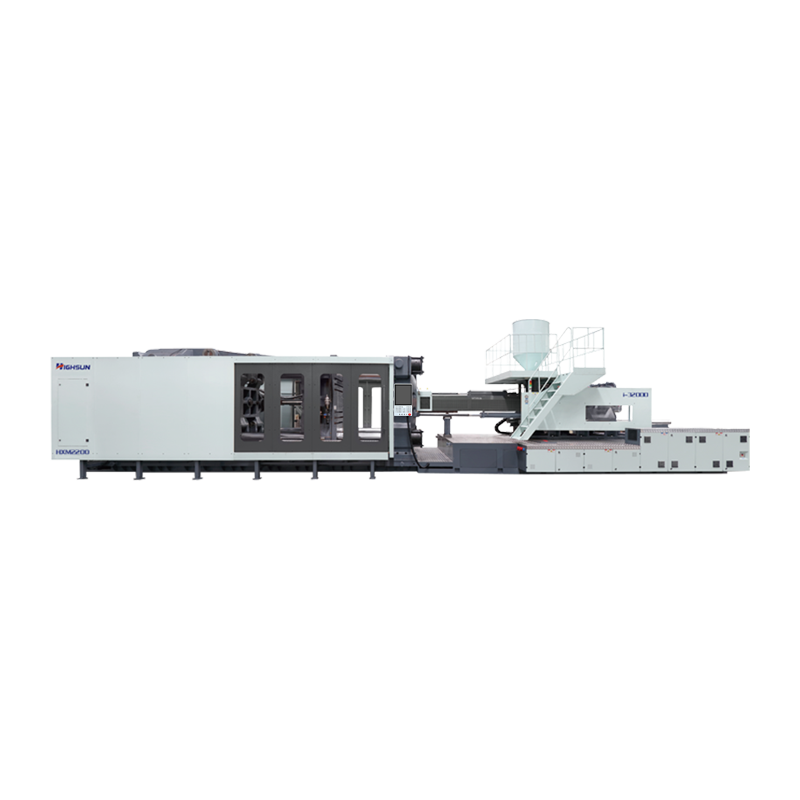
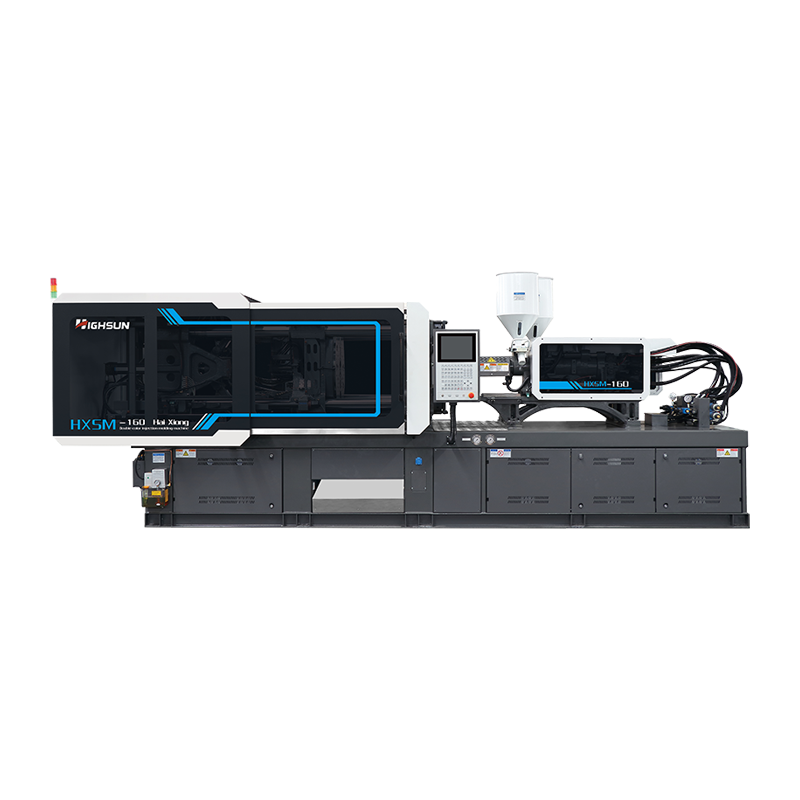 HXS160 Dual-Color Injection Molding Machine for Medium-Size PartsThis two-shot machine with independent injection units and a servo rotary table suits mid-range clamp forces, making it a practical entry point for control panels, handles, caps, and household appliance components.View Product →
For clamp forces around 160–200 tons, purpose-built dual-color machines such as the HXS160 and HXS200 deliver two independent injection units and a servo-sensitive rotary table. This becomes the standard starting point for medium-size control panels, handles, caps, and household appliance parts. The chart below compares the effective production sequence of a two-step insert route and a rotary two-shot route on a relative scale.
Effective Production Sequence: Two-Step vs. Rotary 2-Shot
Two-step route
100% total time
Rotary 2-shot
~55% total time
Relative cycle composition for a medium-complexity two-material part. Actual savings depend on part size, cooling, and material handling.
Common Defects and How Design Prevents Them
Even a well-designed 2-shot mold can fail if the interaction between the two shots is ignored. The table below lists the defects that appear most often in production audits, along with design and machine-level corrective actions.
| Defect | Likely Root Cause | Design / Machine Fix |
|---|---|---|
| Flow marks on first-shot surface | Second shot erodes the substrate at high shear | Reduce second-shot injection speed; reorient gate parallel to the wall |
| Flash at the material boundary | Shut-off land too narrow or clamp force too low | Widen shut-off lands to at least 3 mm; verify clamp tonnage at shot 2 |
| Delamination / peeling | Chemically incompatible pair without mechanical lock | Switch to a compatible pair or add recessed undercuts |
| Voids or sink marks | Thick sections in either shot that shrink non-uniformly | Core out heavy walls; maintain uniform nominal wall thickness |
| Index mismatch | Rotary table indexing error or differential shrinkage | Calibrate index repeatability; add clearance on mating features |
| Witness marks on the visible face | Ejector placement under second shot | Move pins into shut-off lands or use stripper plate |
Cost and Cycle-Time Reality Check
At the quoting stage, many buyers compare two-shot tooling cost per cavity with a single-shot tool. The honest answer is that two-shot tooling costs more because it contains two complete cavity sets, two gate systems, and a far more precise shut-off arrangement. Total cost of ownership usually favors 2-shot molding when annual volume exceeds roughly 50,000 units and the alternative process includes a manual or automated assembly step. Secondary savings—less labor, no glue, no positioning rejects, no second heat history—often cover the tooling premium within the first year of production.
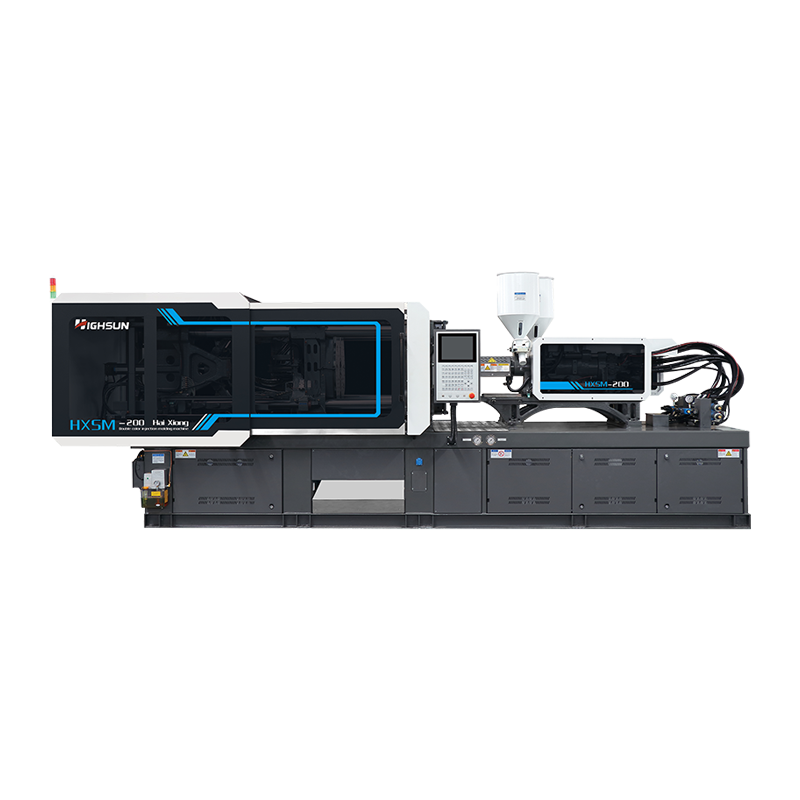 HXS200T Two-Color Servo Energy-Saving Injection Molding MachineWith higher tonnage, larger shot volume, and bigger platen, this model supports heavier soft-touch parts and two-cavity layouts, while its servo drive and dual barrels enable efficient multi-material molding.View Product →
For parts above 20 g or with a large soft-touch surface, the HXS200 offers the shot-volume headroom and platen size to handle bigger single-cavity and two-cavity layouts. It also supports the higher tonnage required when second-shot projected area approaches the clamp limit.
Frequently Asked Questions
Q1: What is 2-shot molding?
2-shot molding, also called two-component or two-color injection molding, is a process in which two different plastics are injected into one rotating mold within a single cycle. The result is a bonded multi-material part that needs no secondary assembly.
Q2: What is the difference between two-shot molding and overmolding?
Overmolding usually applies a second material over a pre-formed substrate that has been molded separately or transferred between tools. Two-shot molding performs both injections in one machine cycle using an index plate, which gives better positional accuracy and a shorter cycle time.
Q3: Which materials can be used in two-color injection molding?
Any pair of injection-grade thermoplastics or thermoplastic elastomers that has acceptable melt compatibility can be used. Common pairs are PP with TPE, ABS with TPC, PC with TPE, PA with primer-treated TPE, and PMMA with TPE for soft-touch consumer products.
Q4: Is double injection the same as 2K molding?
Yes. Double injection, 2K molding, two-component molding, and two-shot molding all describe the same family of processes using two injection barrels and one rotating mold. Some suppliers use "bi-injection" for the same concept.
Q5: How much does a 2-shot injection molding machine cost?
The initial investment is higher than a single-shot press of the same clamp force because the machine includes two barrels, a rotary table, and more complex controls. The cost difference is usually justified by removing assembly steps, reducing cycle labor, and improving part consistency.
Q6: Can 2-shot molding be done on a standard injection molding machine?
No. A standard single-barrel machine cannot inject two materials in one cycle without a separate insert-molding step. True 2-shot molding requires a purpose-built two-shot press with two injection units and a rotary or moving platen.
 +86-188 6861 6288
 haixiong@highsun-machinery.com
 No.36 Yongjiang South Road, Beilun District. Ningbo City, 315800, China