 ENG
ENG  English
 русский
 Español
 Português
 عربى
عربى


Content
- 1 Injection Molding Machines: Selection, Process, Tooling, and Troubleshooting
- 2 What Is an Injection Molding Machine?
- 3 Injection Molding Machine Parts and Functions
- 4 Types of Injection Molding Machines
- 5 Plastic Injection Molding Machine Specifications
- 6 Injection Molding Process Step by Step
- 7 Injection Molded Plastic Parts Examples
- 8 Best Materials for Injection Molding
- 9 Multi-Cavity Mold Design Guide
- 10 How to Choose an Injection Molding Machine
- 11 Buying a Used Injection Molding Machine
- 12 Injection Molding Machine Cost Comparison
- 13 Injection Molding Defects and Solutions
- 14 Troubleshooting Short Shot Molding
- 15 How to Reduce Injection Molding Cycle Time
- 16 Medical Grade Injection Molding Standards
- 17 Final Takeaway
Injection Molding Machines: Selection, Process, Tooling, and Troubleshooting
Injection molding is the workhorse of modern manufacturing, producing everything from bottle caps and consumer products to medical device housings. If you are evaluating injection molding machine products or specifying a new production line, understanding the machine, tooling, materials, and process variables can help you avoid costly mistakes and achieve consistent parts faster.
What Is an Injection Molding Machine?
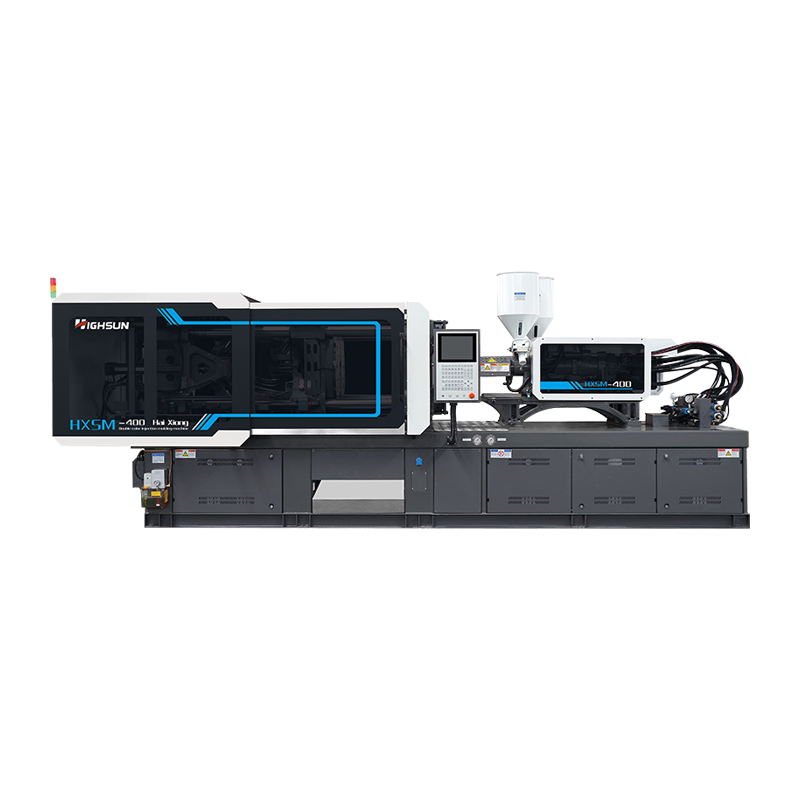
An injection molding machine is a production system that melts plastic, injects it into a mold cavity, packs it under pressure, cools it, and ejects the finished part. The right injection molding equipment can improve part quality, reduce scrap, and increase production efficiency, especially for high-volume applications.
A typical injection molding production cell includes:
- Molding machine: Clamp unit and injection unit
- Mold: Production tooling that forms the part
- Material handling: Dryer, loader, blender, and related equipment
- Cooling: Chiller, thermolator, and mold temperature control equipment
- Automation: Robot, conveyor, vision inspection, and part-handling systems
Injection Molding Machine Parts and Functions
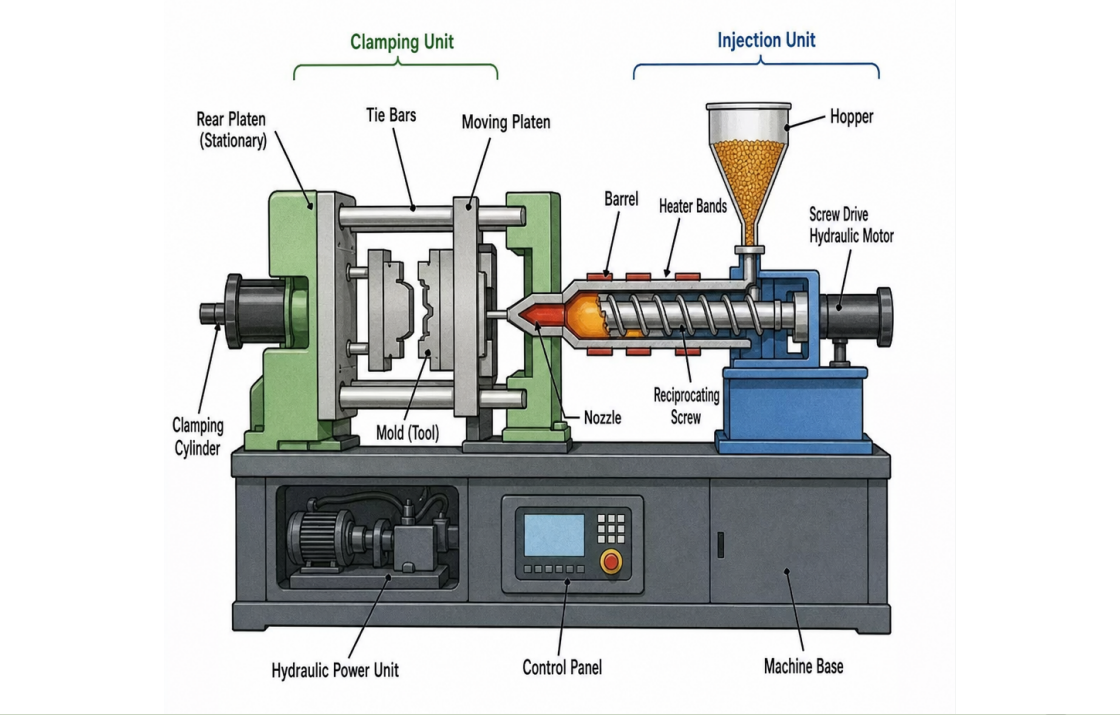
Understanding injection molding machine parts and functions is important for troubleshooting, maintenance, equipment selection, and process optimization.
Hopper and Feed Throat
The hopper stores and feeds resin into the machine. The feed throat transfers material into the barrel and must be properly managed to prevent bridging or inconsistent feeding. Hygroscopic materials typically require a material dryer before processing.
Barrel and Heater Bands
The barrel contains the screw and provides the environment in which polymer is melted. Heater bands maintain the required temperature profile throughout the barrel.
Screw and Check Ring
The screw plasticizes, mixes, and meters the polymer. The check ring helps prevent molten material from flowing backward during injection, supporting consistent shot size and repeatability.
Nozzle
The nozzle transfers molten plastic from the barrel into the mold's sprue bushing. Nozzle design and temperature must match the material, mold, and application.
Injection Unit Drive
The injection unit may use hydraulic, servo-hydraulic, or electric drive technology to control screw rotation and injection movement.
Clamp Unit
The clamp unit, including the platens and tie bars, opens and closes the mold and provides sufficient clamp force to resist cavity pressure during injection and packing.
Ejector System
The ejector system removes the molded part from the core. Proper ejector timing and force are essential to prevent sticking, deformation, stress whitening, or part damage.
Controls and Sensors
Modern machines use controllers and sensors to monitor and regulate injection pressure, speed, temperature, screw position, cycle time, alarms, and process recipes.
Types of Injection Molding Machines
When comparing types of injection molding machines, consider the required precision, speed, energy consumption, material, part geometry, production volume, and operating environment.
Electric vs. Hydraulic Injection Molding Machines
Electric injection molding machines are commonly selected when high precision, repeatability, cleanliness, and energy efficiency are important.
Advantages of electric machines include:
- High positioning accuracy
- Excellent shot-to-shot repeatability
- Lower energy consumption in many applications
- Low operating noise
- Suitability for clean and controlled production environments
Potential limitations include:
- Higher initial equipment cost
- Application limitations for certain very large-tonnage or extreme-duty requirements
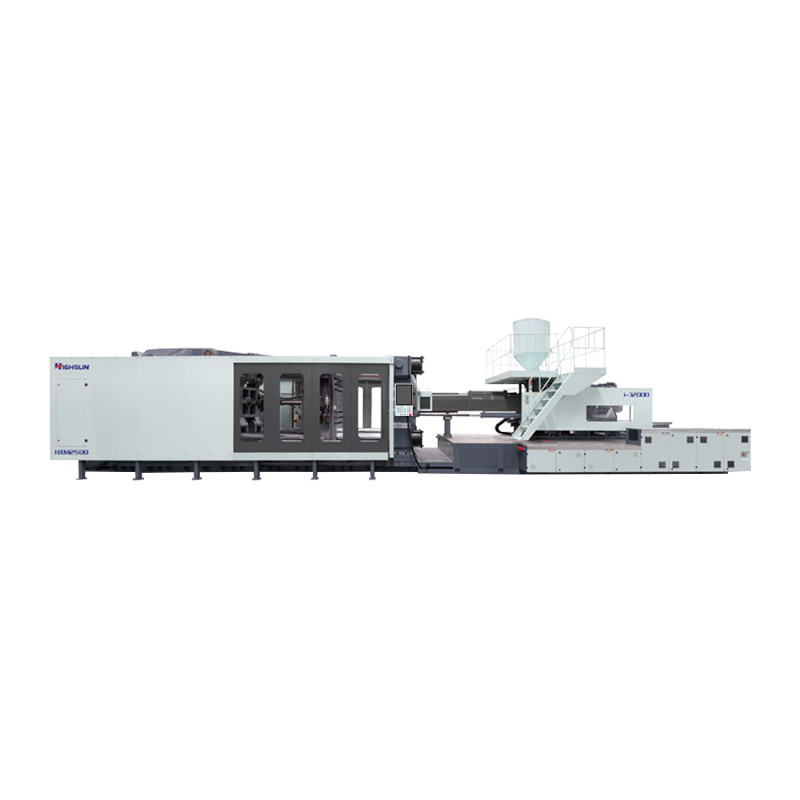
Hydraulic injection molding machines are widely used for large parts and demanding industrial applications.
Advantages include:
- Broad range of available clamp forces
- Strong performance for heavy-duty applications
- Flexible process capability
- Established technology with extensive service experience
Potential considerations include:
- Higher energy consumption compared with many modern electric systems
- Hydraulic oil maintenance
- Greater attention to cleanliness and leakage control
Hybrid and Servo Injection Molding Machines
Many modern machines use hybrid or servo-hydraulic systems. The benefits of servo drive injection molding can include:
- Reduced energy consumption compared with conventional hydraulic systems
- Faster and more precise motion control
- Lower heat generation
- Improved process stability
- Better control of demanding molding applications
Specialty Injection Molding Machines
Depending on the plastic injection molding application, specialized equipment may be required, including:
- High-speed packaging machines
- Multi-component and 2K molding machines
- Insert molding machines
- LSR injection molding machines
- Micro-molding machines
Plastic Injection Molding Machine Specifications
The terms plastic injection molding machine and plastic injection machine are often used interchangeably. When comparing equipment, however, the purchasing specification should be precise.
Important parameters include:
- Clamp force: kN or tons
- Shot size: grams or ounces
- Screw diameter: mm
- Screw L/D ratio
- Injection pressure
- Injection speed
- Plasticizing and recovery rate
- Platen dimensions
- Tie-bar spacing
- Minimum and maximum mold thickness
- Maximum daylight
- Ejector stroke and force
Injection Molding Process Step by Step
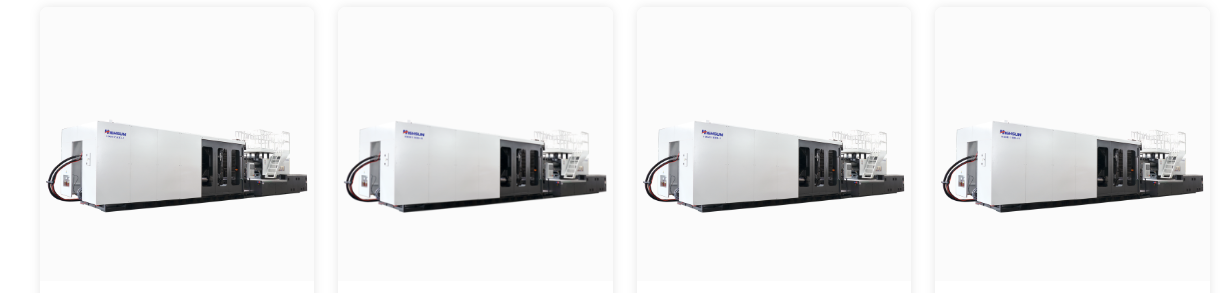
Understanding the injection molding process step by step makes it easier to identify the variables that influence quality and cycle time.
1. Material Preparation
Dry the resin when required and maintain the manufacturer's specified moisture level. Incorrect material preparation can cause splay, brittleness, dimensional instability, and other defects.
2. Plasticizing
The screw rotates and melts the polymer. Back pressure can be adjusted to improve mixing and melt consistency.
3. Mold Closing and Clamp Build-Up
The mold closes and the clamp builds sufficient force before injection begins.
4. Filling
Molten polymer is injected into the cavity. Injection speed, pressure, melt temperature, mold temperature, and flow behavior all affect filling performance.
5. Packing and Holding
Pack and hold pressure compensates for material shrinkage while the gate remains open. The goal is to achieve the required part weight and dimensions without excessive stress.
6. Cooling
Cooling is often one of the largest contributors to total cycle time. Wall thickness, mold temperature, cooling-channel design, and coolant flow strongly influence cooling performance.
7. Mold Opening
The mold opens after sufficient cooling. Controlled mold movement helps prevent part drag, deformation, or vacuum-related sticking.
8. Ejection and Part Handling
Ejector pins, air, robots, or other systems remove the molded part. Automated handling can improve consistency and reduce mold-open time.
9. Cycle Repeat
The machine returns to the beginning of the cycle. The objective is a stable and repeatable process window, rather than simply achieving the shortest possible cycle.
Injection Molded Plastic Parts Examples
Different part geometries place different demands on the machine and mold.
Thin-Wall Containers
Thin-wall packaging requires high injection speed, stable melt temperature, effective venting, and fast cycle times.
Gear Housings
Gear housings require strong dimensional control, consistent packing, and balanced cooling to minimize warpage.
Connectors
Connectors often require tight dimensional tolerances, consistent shot size, effective venting, and reliable mold alignment.
Medical Components
Medical components may require process validation, material traceability, controlled manufacturing environments, and detailed process data.
Best Materials for Injection Molding
Selecting the best materials for injection molding depends on mechanical strength, chemical resistance, temperature requirements, appearance, dimensional stability, cost, and regulatory requirements.
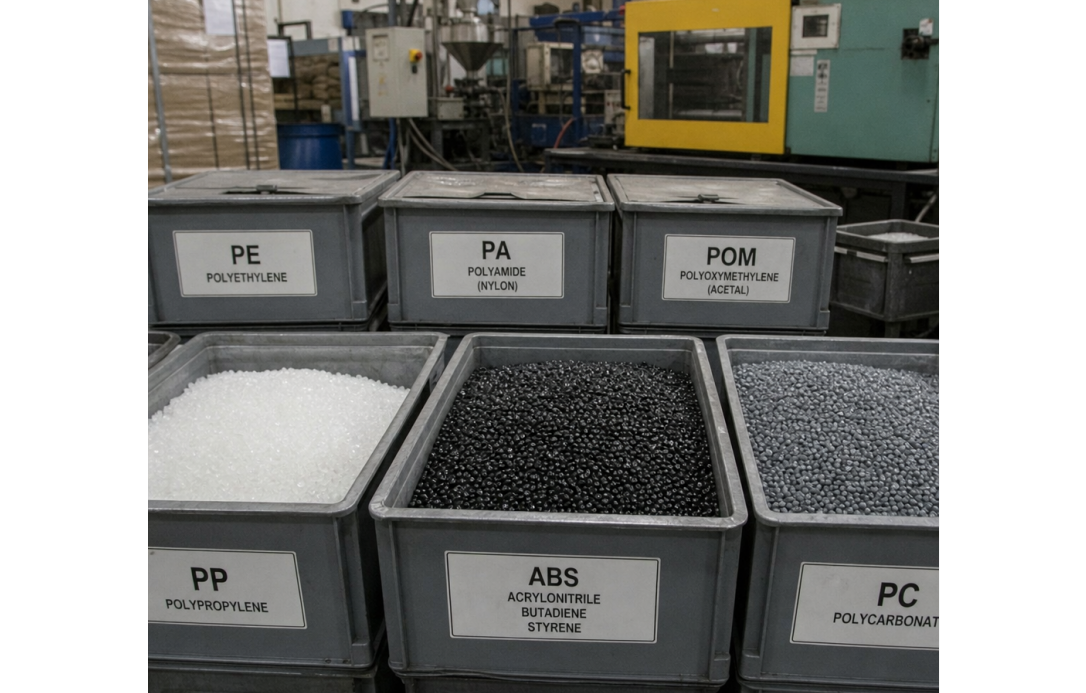
PP and PE
Polypropylene (PP) and polyethylene (PE) are economical materials with good chemical resistance. PP is also widely used for applications requiring living hinges.
ABS
ABS offers a useful combination of toughness, appearance, and processability, making it common in consumer housings and industrial components.
PC
Polycarbonate (PC) provides high impact resistance and can offer excellent clarity, although it generally requires more demanding processing conditions than commodity resins.
PA / Nylon
Polyamide (PA or Nylon) provides strength and wear resistance. Moisture control and proper drying are particularly important.
POM / Acetal
POM (Acetal) offers low friction, good dimensional stability, and wear resistance, making it suitable for gears and precision mechanical components.
PEEK and PEI
PEEK and PEI are high-performance engineering polymers used in demanding temperature, chemical, and mechanical environments. They require appropriately designed tooling and high-temperature processing capabilities.
Tip: Material selection should always be evaluated together with gate design, venting, cooling, mold temperature, and the machine's pressure and temperature capabilities.
Multi-Cavity Mold Design Guide
A multi-cavity mold design guide should focus on increasing output without introducing excessive process sensitivity or maintenance risk.
Key considerations include:
- Runner balance: Maintain consistent flow to every cavity
- Gate design: Control shear, filling behavior, and gate freeze
- Venting: Provide effective gas evacuation for each cavity
- Cooling: Maintain consistent temperature across all cavities
- Parting line integrity: Prevent flash and maintain mold alignment
- Maintenance access: Make high-cavitation tools practical to service
When scaling from one or two cavities to 8, 16, 32, or 64 cavities, verify that the injection molding machine has sufficient:
- Shot capacity with an appropriate cushion
- Injection rate for simultaneous cavity filling
- Plasticizing capacity
- Clamp force
- Mold mounting space
How to Choose an Injection Molding Machine
When determining how to choose an injection molding machine, start with the part, material, and mold, rather than selecting a machine based only on catalog tonnage.
Production Requirements
Define:
- Annual production volume
- Required cycle time
- Number of cavities
- Expected uptime
- Target scrap rate
- Required automation level
Material Requirements
Evaluate:
- Resin viscosity
- Melt temperature
- Mold temperature
- Drying requirements
- Reinforcement or filler content
- Corrosive or abrasive characteristics
Clamp Force
Estimate the required clamp force based on projected part area, cavity pressure, material, and process conditions. Avoid both insufficient tonnage and unnecessary over-sizing.
Shot Size
Select a machine that can produce the required shot while maintaining a reasonable operating range. Avoid consistently operating at the extreme limits of the injection unit.
Injection Speed and Pressure
High-speed injection may be critical for thin-wall parts, long flow lengths, and demanding filling patterns. Verify that the machine can achieve the required injection rate without reaching its pressure or speed limits.
Mold Dimensions
Check:
- Platen dimensions
- Tie-bar spacing
- Mold thickness range
- Maximum daylight
- Ejector specifications
- Mold weight capacity
Process Monitoring
For demanding applications, consider cavity pressure monitoring, temperature monitoring, data logging, alarm limits, and recipe management.
Automation Compatibility
If automation is planned, verify compatibility with:
- Robot interfaces
- End-of-arm tooling
- Conveyors
- Vision inspection
- Part separation
- Safety systems
Buying a Used Injection Molding Machine
If you are searching for an injection molding machine for sale, evaluate the machine's condition rather than focusing only on its purchase price.
Request:
- Run hours
- Maintenance records
- Screw and barrel wear measurements
- Hydraulic oil condition, where applicable
- Controller version
- Electrical system condition
- Spare-parts availability
- Service history
- Proof of process repeatability
Whenever possible, run the machine with a representative mold or your actual production mold before purchase.
Injection Molding Machine Cost Comparison
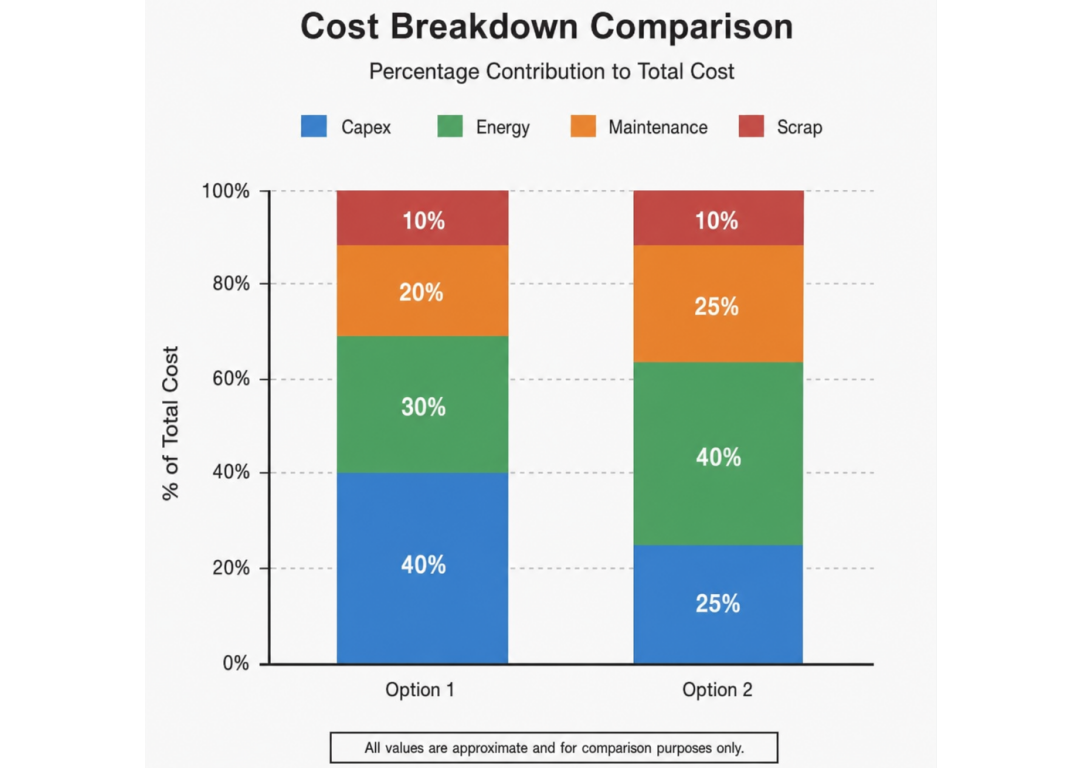
An injection molding machine cost comparison should consider the total cost of ownership rather than the initial purchase price alone.
Major cost drivers include:
- Machine architecture: electric, hydraulic, or hybrid
- Clamp force
- Shot capacity
- Automation capability
- Safety systems
- Controller functions
- Process monitoring
- Precision packages
- Local service coverage
- Warranty
- Spare-parts availability
Also consider ongoing costs such as:
- Energy consumption
- Cooling requirements
- Preventive maintenance
- Spare parts
- Training
- Commissioning
- Downtime
- Scrap
- Production efficiency
A machine with a higher purchase price may have a different overall economics profile once energy consumption, maintenance, productivity, and downtime are included.
Injection Molding Defects and Solutions
Most molding defects can be traced to problems involving filling, packing, cooling, material condition, venting, or mold design.
Flash
Possible causes include excessive cavity pressure, insufficient clamp force, parting-line damage, mold misalignment, or excessive wear.
Check:
- Injection pressure
- Injection speed
- Clamp force
- Parting-line condition
- Mold alignment
- Mold wear
Sink Marks
Possible causes include insufficient packing, premature gate freeze, excessive local wall thickness, or inadequate cooling.
Potential adjustments include:
- Optimizing pack and hold pressure
- Increasing effective packing time
- Improving gate design
- Improving cooling
- Reducing excessive rib or wall thickness
Warpage
Warpage is often related to uneven cooling, differential shrinkage, excessive molecular orientation, or unbalanced packing.
Check mold-temperature symmetry, cooling performance, packing conditions, and flow orientation.
Burn Marks
Burn marks can indicate trapped gas and inadequate venting, especially near the end of fill.
Check:
- Mold vents
- Vent cleanliness
- Injection speed near the end of fill
- Gas-trap locations
- Material condition
Splay and Silver Streaks
Splay may result from moisture, excessive shear, contamination, or poor venting.
Verify resin drying, material handling, screw conditions, and processing parameters.
Weld Lines
Weld lines occur when separate melt fronts meet.
Possible process improvements include:
- Adjusting melt temperature
- Adjusting mold temperature
- Optimizing injection speed
- Improving venting
- Reviewing gate location
Troubleshooting Short Shot Molding
For short shot molding, check the following areas systematically.
1. Material and Drying
Verify resin type, moisture level, regrind ratio, material flow, and feed-system condition.
2. Melt Temperature
Check whether the melt temperature is too low and verify barrel-zone temperatures, thermocouples, heater performance, and plasticizing behavior.
3. Injection Speed and Pressure
Determine whether the machine is reaching its maximum injection pressure or speed limit before the cavity is filled.
4. Venting and Gas Traps
Blocked or inadequate vents can prevent complete filling. Clean existing vents and review gas-trap locations.
5. Gate and Runner Restrictions
Inspect the gate, runner, sprue, and cold slug area for restrictions or incorrect dimensions.
6. Cushion and Shot Size
Verify shot size, cushion stability, and check-ring performance. Inconsistent cushion can indicate an injection-unit or screw/check-ring problem.
How to Reduce Injection Molding Cycle Time
To reduce injection molding cycle time, focus particularly on cooling and part handling while maintaining part quality.
Optimize Mold Cooling
Improve cooling-channel layout, coolant flow, turbulence, and proximity to the molded part.
Optimize Pack and Hold
Shorten pack and hold only after confirming gate freeze time and part-weight stability. Reducing holding time too aggressively can increase sink marks, shrinkage, and dimensional variation.
Improve Venting
Effective venting can allow faster filling while reducing burn marks and trapped-gas defects.
Improve Automation
Robots and automated part handling can provide consistent removal and reduce mold-open and mold-close delays.
Optimize Ejection
Proper ejector timing, stroke, and part release can prevent sticking and unnecessary cycle delays.
Important: A shorter cycle is only an improvement when quality remains stable. Monitor OEE, scrap rate, part weight, dimensional variation, and downtime, not cycle time alone.
Medical Grade Injection Molding Standards
For regulated medical components, medical grade injection molding standards involve much more than producing visually acceptable parts.
Production planning may include:
- IQ/OQ/PQ process validation
- Material traceability
- Lot control
- Controlled material handling
- Cleanroom compatibility where required
- Calibrated measurement equipment
- Change management
- Process monitoring
- Alarm management
- Production data retention
For these applications, machine selection should emphasize repeatability, process control, traceability, and data capture, not simply clamp tonnage.
Final Takeaway
Successful injection molding depends on the alignment of machine, mold, material, and process.
The right plastic injection molding machine should provide sufficient clamp force, injection capacity, mold compatibility, process control, and repeatability for the intended application. At the same time, the mold must provide effective filling, venting, cooling, and ejection.
Use the injection molding cycle—fill, pack, cool, and eject—as the framework for optimization. When defects occur, treat them as process signals that can point to issues with moisture, pressure, temperature, airflow, material behavior, or cooling balance.
With disciplined machine selection, well-designed tooling, controlled materials, and systematic process monitoring, manufacturers can improve repeatability, reduce scrap, shorten cycle times, and scale production with greater confidence.
 +86-188 6861 6288
 haixiong@highsun-machinery.com
 No.36 Yongjiang South Road, Beilun District. Ningbo City, 315800, China